

FREE SHIPPING OVER $250.00 (Excludes furniture/equipment, other exclusions apply)
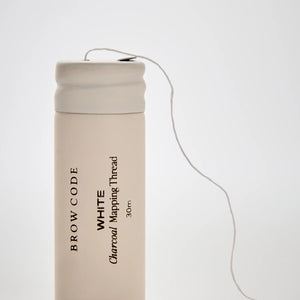
Designed for precision, our new & improved Charcoal Brow Mapping Thread is a must-have salon essential.
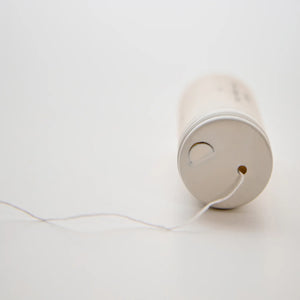
At 1mm thick, it delivers crisp, controlled lines, while the 30-meter length ensures long-lasting use. Infused with activated charcoal, the buildable pigment allows for effortless adjustments without staining the skin, giving you complete control to perfect every brow design with accuracy and ease.
Pre-Inked for Effortless Application - Infused with premium activated charcoal for smooth, high-visibility markings.
Ultra-Pigmented - Delivers bold, crisp lines for precision styling and shaping.
Fine & Flexible for Precision - Designed for ultimate control, ensuring sharp, accurate brow mapping.
User-Friendly & Mess-Free - Easy to handle for seamless, professional application.
Enhances Symmetry & Definition - Perfect for creating balanced, flawless brows with confidence.
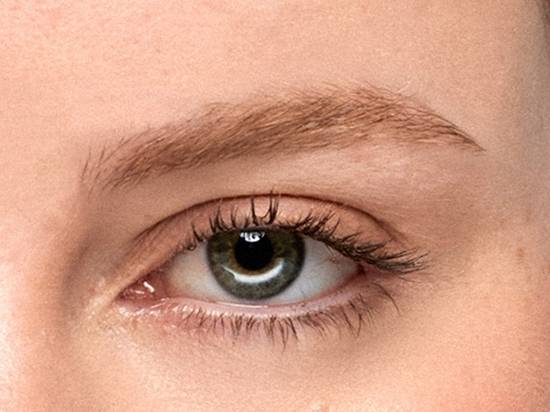
Achieve precise, symmetrical brows using the Brow Code Charcoal Mapping Thread & Kit. Follow the steps below to map and shape brows with control and accuracy.

Complete a patch test before proceeding.
Ensure the brow area is clean, dry, and free from makeup or oil.
Use a professional-grade, oil-free cleanser to remove any residue, then pat dry with a cotton pad.
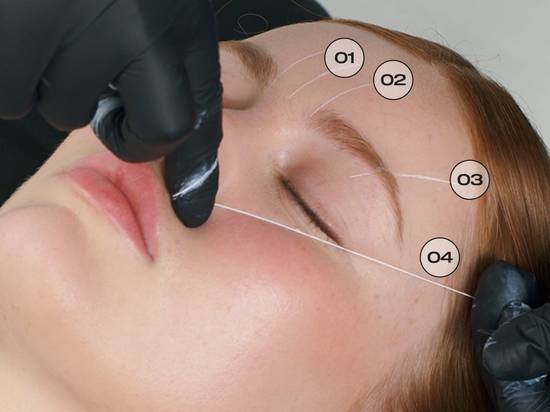
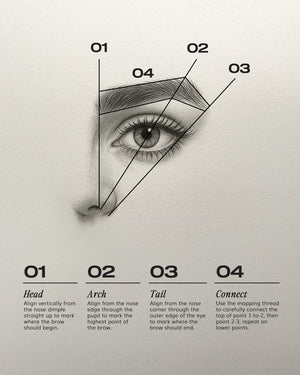
Cut a section of Black or White Charcoal Mapping Thread. Use the nose as a guide to carefully mark the following brow mapping points:
Centre: Align with the center of the nose to determine the midpoint between both brows for overall symmetry.
Head: Place a vertical line from the dimple (indentation) of the nose straight up to where the brow begins. This ensures the brows start in alignment with the natural facial structure.
Arch: Identify the highest point of the brow by aligning from the outer edge of the nose through the center of the pupil. This is the peak that gives the brow its signature lift.
Tail: Extend a line from the outer corner of the nose through the outer corner of the eye to mark where the brow should end. This prevents it from being too short or overly elongated.
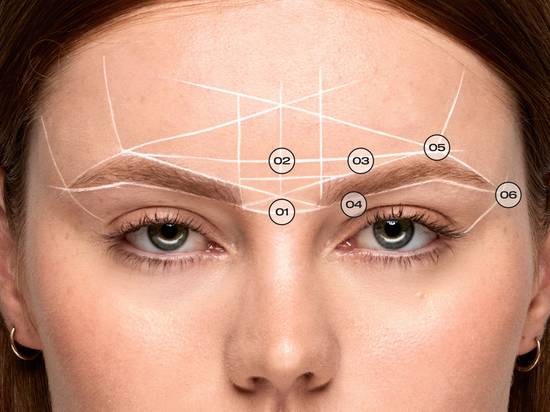
Once the key points are identified, use the Black or White Charcoal Mapping Thread to connect them and create a precise outline.
Base: Place the thread horizontally underneath the brow head to mark its lowest point.
Top: Place the thread horizontally above the brow head to mark its highest point.
Peak: Place the thread horizontally across the highest point of the arch to determine the ideal brow height
Lower Brow Line: Start at the center point and draw a line along the lower edge of each brow, beginning at the base of the brow head and ending at the base of the arch.
Upper Brow Line: Place the thread at the base of one brow, then connect it through the centre to the peak of the opposite brow. Repeat this process on the other side to outline the upper edges of both brows.
Tail Taper: To taper the tail, draw a line from the arch to the tail point along both the upper and lower edges of each brow.
Carefully assess the overall symmetry, height, and shape of both brows. Adjust the mapping lines as needed to ensure balance and proportion before moving into shaping.
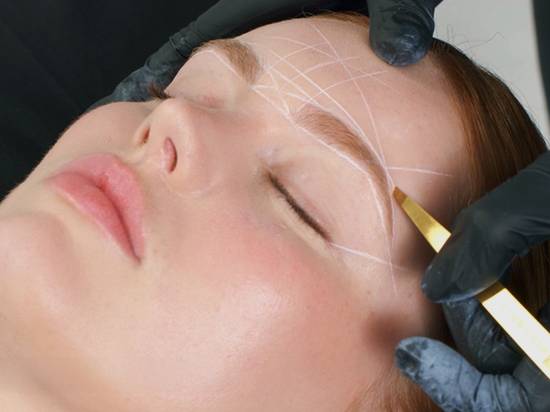
Wax, Tweeze and/or Trim Brows to desired shape.
Trimming: It’s very important to brush the brow hairs into their natural direction before this step. Use the Trimming Scissors to trim any stray hairs outside the mapped guideline, if necessary. Do not brush brow hairs upwards or downwards to trim.
Waxing: Apply wax and remove hair outside the mapped shape.
Tweezing: Use Slant Tweezers to remove any remaining stray hairs and refine the shape.

Wipe the brows gently with a damp cotton round to remove any remaining mapping pigment. Apply your chosen aftercare product to calm and hydrate the skin post-treatment.
Key Features:
Stain's key ingredients are naturally derived, paraben-free and cruelty-free:
Henna: Naturally dyes and enhances hair strength, nourishment, and growth.
Aloe Vera: Controls excess oil and protects hair from UV damage.
Rose Extract: Softens hair and adds shine.
Saffron: Promotes healthy hair growth and repairs damaged strands.
Lemon Essential Oil: Naturally cleanses and restores a healthy pH balance.
FAQs
What is Stain Hybrid Dye?
Our cutting-edge eyebrow dye is key to achieving well-defined, striking brows. It combines the intense staining power of henna with the convenience of tint.
How long does the Hybrid Dye last?
When used alongside premium preparation and aftercare products, Brow Code Hybrid Dye can stain the skin for up to ten days and the brow hairs up to six weeks.
What are the before and aftercare instructions for Stain Hybrid Dye?
Follow these tips for optimal results:
Avoid applying makeup and facial cleansers in the brow area for the next 24 hours.
Avoid extended exposure to direct sunlight, sunbeds, saunas, steam rooms, and swimming pools for the next 24 hours.
Refrain from using exfoliants and anti-aging products around the brow area for at least two to three days before and after the treatment. Likewise, do not use self-tanning products on the face for two to three days before and after the session.
Resist the urge to excessively touch the treated area to prevent oils from entering and clogging pores.
Can I perform lamination and stain in the same service?
Certainly. We suggest applying eyebrow stains between steps 2 and 3 of the lamination process. Alternatively, you can stain the brows 24 hours before or after completing lamination.
Is Stain Hybrid Eyebrow Dye safe for pregnant and breastfeeding women?
This product is not recommended for pregnant and breastfeeding women to avoid the risk of chemicals penetrating the skin and potentially entering the bloodstream. Kindly consult with your healthcare professional before use.
How long is the recommended service duration?
Application may take 5 to 12 minutes based on the desired outcomes and intensity. While 10 minutes is typically enough to ensure flawless results, we recommend closely monitoring the dye's progress for effective colour processing.
How is eyebrow stain different from brow tint & henna?
Professional brow stain and henna last up to 10 days on the skin. However, the stain remains on the hairs for up to 6 weeks, while Henna lasts up to 4 weeks.
On the other hand, eyebrow stain lasts longer than tint. That said, we advise offering both treatments to cater to various preferences and skin types. It’s also important to use high-quality brow staining kits and sculpting products.
Airbrush Application:
Apply Silicone Eyebrow Stencils to define the area for Stain application. Ensure the borders are secure to prevent the Stain Hybrid Dye from seeping beyond the desired area.
Fill the dispenser with a 1:1 ratio of Stain to Liquid Oxidant 3%, or approximately 8 drops Stain to 8 drops Liquid Oxidant.
Pro Tip:
For a more pigmented and longer-lasting finish, our founder, Melanie Marris, recommends a 2:1 mixing ratio or 10 drops of Stain to 5 drops of Liquid Oxidant.
Set the Airbrush Machine to your preferred speed and test spray onto a clean, dry cotton pad to check shade and consistency of the spray.
Spray a light layer of Stain from the tail of the eyebrow towards the front of the brows. Let it set for 1-2 minutes, then apply a second layer following the same direction. Allow this layer to set for 1-2 minutes before continuing.
Pro Tip:
Maintain a distance of 5-10 cm from the brows during application.
For the final layer, work from the tail towards the front, ensuring thorough coverage for the client’s desired look.
After completing the Stain layering, carefully remove the Silicone Eyebrow Stencils. Use a damp cotton tip to clean up any overspray from the Airbrush. Allow the Stain to process on the brows for a total of 8 to 12 minutes, depending on the desired intensity and saturation level.
Gently remove the Stain with a damp cotton pad, starting from the head of the brow and moving towards the tail.
Pro Tip:
Be careful not to scrub back and forth to avoid removing the Stain Hybrid Dye from the skin.
Brush the eyebrows into place to complete the Airbrush Stain application process.
If you’d like more educational resources about our Airbrush Machine and application techniques, please visit our Educational Portal.
Directions
Patch Test
Always conduct a patch test on the skin before application to ensure there are no allergic reactions
Brow Preparation
Thoroughly cleanse the eyes and eyebrows before staining, removing makeup, oils, and skin residue.
Prepare Stain Hybrid Dye
Shake the dye bottle thoroughly before use. Blend 4 drops of Brow Dye with 2 drops of Oxidant in a mixing dish to achieve a creamy consistency. Ensure it isn’t too watery.
Use the application stick or brush to mix the two products together until a creamy paste has formed.
Stain Application
With the client's eyes closed, carefully apply the mixed Hybrid Dye to the eyebrows using the application brush for a precise result. Start from the head of the brow, working your way outwards to the tail, Spread evenly, ensuring it is applied within your desired brow shape, as the dye will immediately begin to stain the skin.
Stain Processing
Allow the dye to process on the eyebrows for 5-12 minutes. Ideally, 10 minutes achieves a balanced shade, but monitor closely for desired intensity.
Pro Tip: For a stunning ombre effect, clear the dye from the brow's head a few minutes before removing the rest of the dye.
Stain Removal
Before removing the stain completely, make sure the dye is wet by retouching with the tinting brush. Use a dry cotton tip to gently blend away excess dye, wiping from brow head to tail. For residual dye outside the brow shape, use a moistened cotton pad and wipe across. Avoid scrubbing motions.
Brow Aftercare
As the stain oxidises and develops on the skin, the colour will become softer in the days to follow. For best results and prolonged wear, advise clients to:
Keep brows dry for 24 hours.
Avoid sunbeds, saunas, steam rooms, swimming pools etc.
Steer clear of makeup or cleansers on the brows for 24 hours.
No scrubbing or exfoliating near brows for 24-72 hours after staining.
Refrain from tanning products around the brows for 24-72 hours after staining.
Sign up to get the latest on sales, new releases and more …

Sign up today to shop our exclusive products & promotions